Zooming and navigating the Canvas
You can hold the spacebar and click and drag to pan around the Canvas, or use the arrow keys if you haven’t selected any layers.
There’s a few ways to zoom in and out:
- Hold the ⌘ key and use your mouse’s scroll wheel. We’ll scroll in by default when you scroll up, but you can change this at any point by checking the Invert scroll direction checkbox in the Canvas tab in your Settings.
- Use the pinch gesture on a trackpad or use the Zoom menu in the toolbar.
- Use the Zoom tool by pressing Z and either click to zoom in or hold ⌥ and click to zoom out. With the Zoom tool enabled, you can click and drag a selection to zoom into a specific area.
There are also a few Zoom shortcuts:
| ⌘+ | Zoom In |
| ⌘- | Zoom Out |
| ⌘0 | Zoom to 100% |
| ⌘1 | Zoom to see the whole canvas |
| ⌘2 | Zoom to selected layer(s) |
| ⌘3 | Center selected layer(s) on the canvas |
Showing pixels on the Canvas
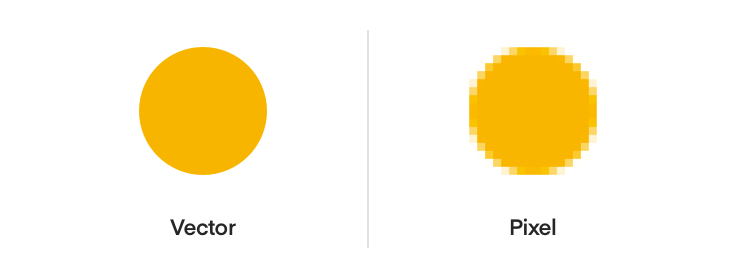
By default, you’ll view the Canvas in vector mode. It’s resolution independent and you can zoom infinitely to work at any level of detail. The Mac app measures layers in points — where one point is equal to one pixel on the Canvas — and when you export, you can scale things to different resolutions.
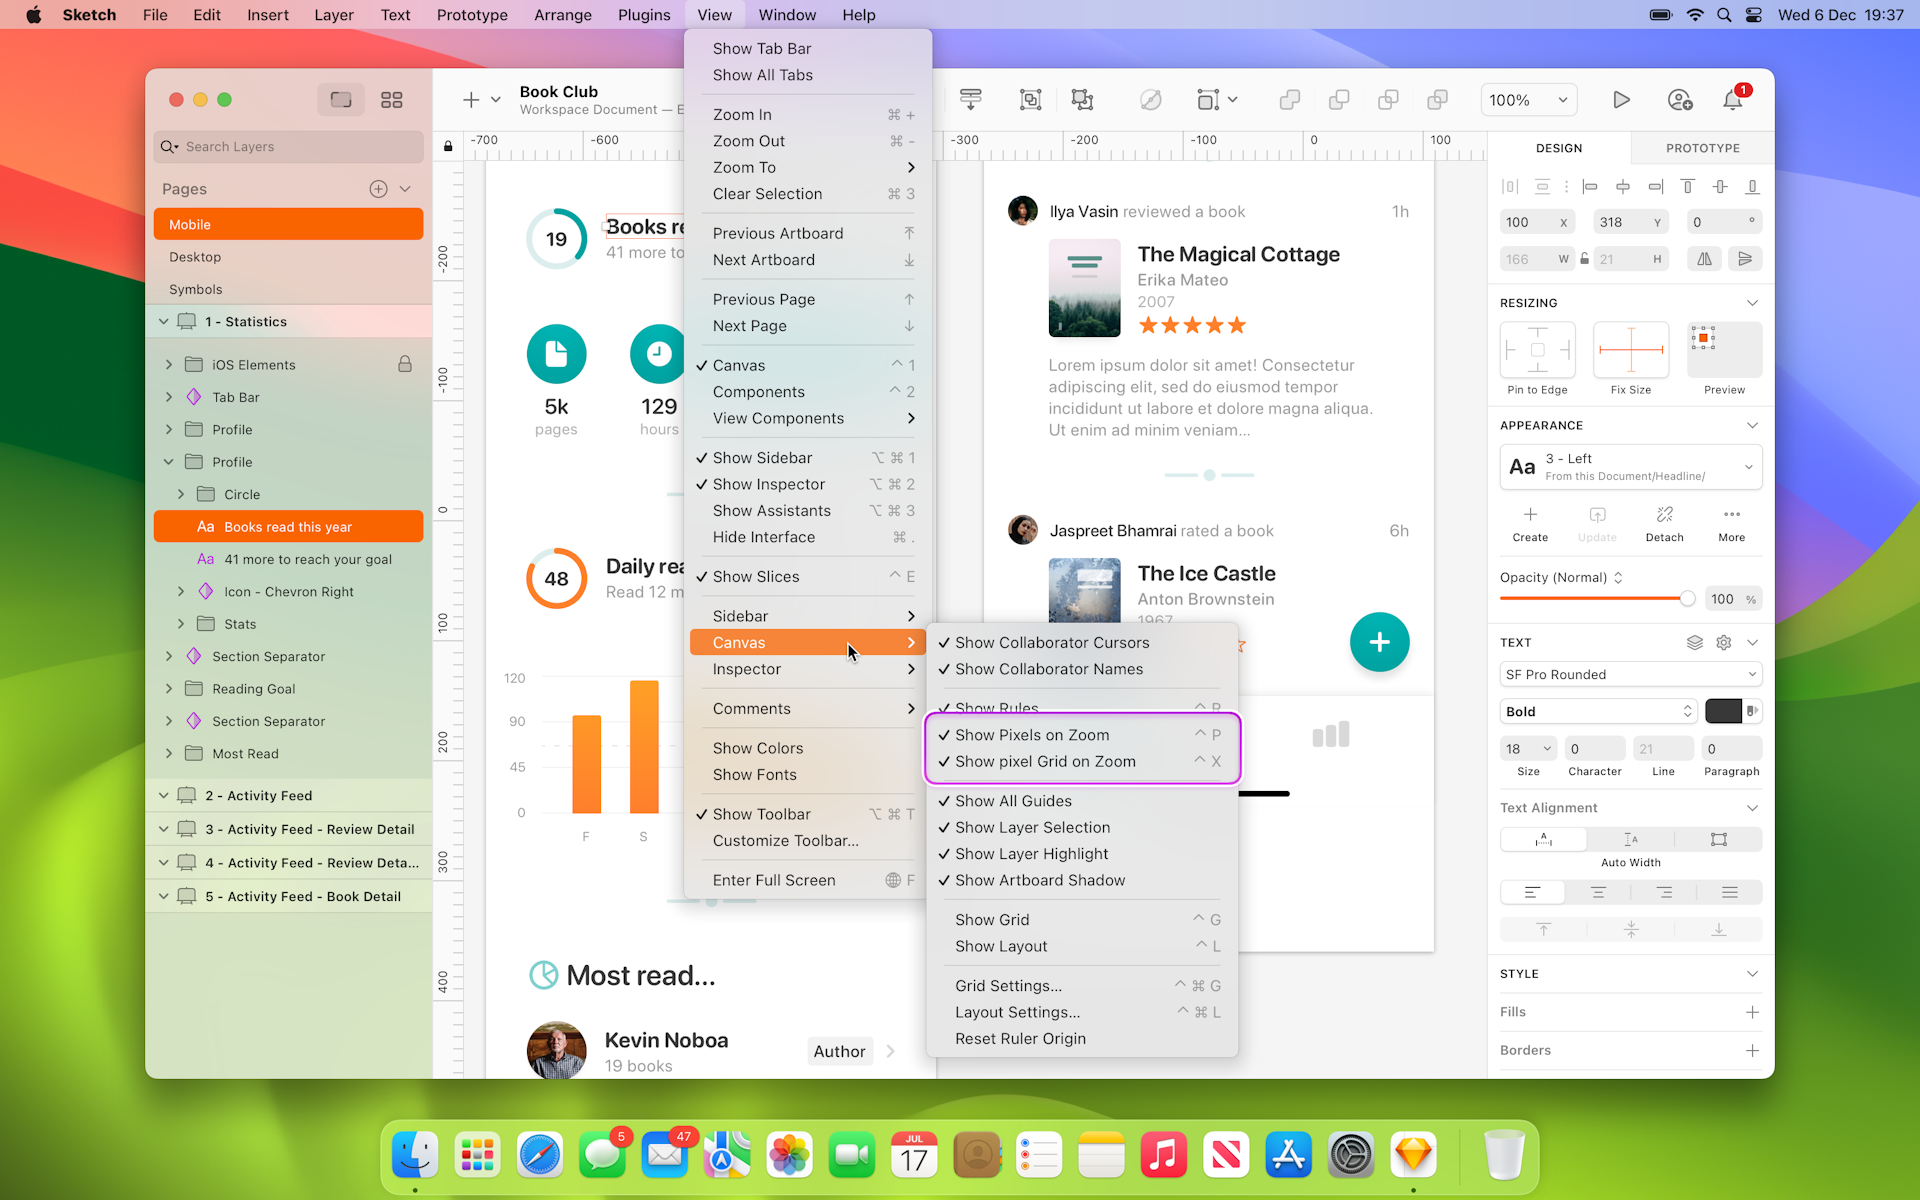
If you’re working on a design where it’s important to be able to see individual pixels, select View > Canvas > Show Pixels on Zoom or press ⌃P to enable Pixel Zoom and view individual pixels when you zoom in past 100%.

Showing the pixel grid
Select View > Canvas > Show Pixel Grid on Zoom, or press ⌃X, to see any edges of your layers that don’t align with the Pixel Grid once you zoom in past 600%.

How to show the pixel grid
Using Rulers
The Mac app hides rulers by default, but you can show them by selecting View > Canvas > Show Rulers or pressing ⌃R.
You can click and drag on your rulers to set their zero origin anywhere you like on the canvas. To lock them in place, click the lock icon in the corner. To reset your rulers’ origins, choose View > Canvas > Reset Ruler Origin or Control-click on the rules and choose the same option from the context menu.
How to move and lock rulers
Creating Guides
You can click anywhere on a ruler to create a guide. Guides will be visible when your rulers are and if you move a layer on your Canvas it will snap to the nearest guide.
How to set guides on the Canvas, and a layer being moved to snap against them
You can move a guide by clicking and dragging on it inside a ruler. To remove a vertical guide completely, drag it right towards the Layer List or Inspector until your cursor changes and the guide disappears. To remove horizontal guides, drag them to the top or bottom of the current window.
How to remove guides
To remove all of your guides together, Control-Click one of the rulers and select Remove All Vertical Guides or Remove All Horizontal Guides, respectively.
Creating Grids
The Mac app supports two types of grid; a regular (square grid) and a layout grid. You can view both at the same time if you need to.
Square grids
To set up a square grid, choose View > Canvas > Show Grid or press ⌃G. To change its settings (the size of the cells, how often thicker lines appear and the color of the lines), choose View > Canvas > Grid Settings or press ⌃⌘G.
How to create and adjust a square grid
Tip: To hide and show regular grids, press ⌃G on your keyboard
Layout grids
To set up a layout grid, choose View > Canvas > Layout Settings… or press ⌃⌘L and use the options that appear to choose the number of columns and rows, their widths, gutter widths and colors.
How to create and adjust a layout grid
You can only apply grids to Artboards, or to the Canvas if there aren’t any Artboards on it. You can edit the layout options for multiple Artboards at the same time.
When you have a layout grid set up, layers will snap to it and ignore the Mac app’s Smart Guides.
Tip: To hide and show layout grids, press ⌃L on your keyboard.
Snapping and Smart Guides
As you move or insert layers and Symbols on the Canvas, the Mac app will automatically show you measurements against nearby layers, as well as Smart Guides that help you snap to a nearby layer’s centre or edges.
How to measure distances between layouts
If you have two or more layers next to each other, and move another near to them, we’ll highlight their distance and automatically snap that layer to distribute them all equally.
Layers will snap to be an equal distance apart
When you resize a layer, if there are similar layers nearby we’ll show you if they have a similar width or height. This also works when you’re resizing a layer that’s overlapping another.
Layers will snap to be the same height when they’re resized
Finally, when you insert or move text layers, they’ll snap to the height or width of nearby layers. Adjust the height of a text layer will also snap the bounding box to the last line of text.
Text layers will snap to the height or width of nearby layers
Using Pages
You can use as many Pages as you like in your Sketch document. They’re handy for organizing your work, for example to create a new page for each iteration, or to split complex designs into multiple pages by dedicating a page to each area. Using multiple pages can also help to improve the Mac app’s performance with complex documents.
To create a new Page, click on the add button at the top of the Layer List, and give your new Page a name.
How to add new pages in the Layer List
Click on the Page you want in the Layer List to navigate to it, or press Fn↑ or Fn↓ to jump between them.
You can also collapse your list of Pages using and use a drop down menu to navigate between them instead.
How to navigate between pages in the Layer List
You can drag Pages to change their order, or Control-Click on a Page to duplicate or delete it.
Once you’ve created pages, you can drag Artboards or layers within the Layer List from one Page to another in the Pages panel.
How to move Artboards and layers between pages in the Layer List
Using Artboards
Artboards are completely optional, but handy for creating fixed frames on the Canvas to create your work in. They’re especially useful if you’re designing for a specific device or screen size.
To create an Artboard, choose Insert > Artboard from the toolbar or menu bar, or press A. You can either click and drag on the Canvas to create a custom size Artboard, or choose from the Artboard Templates in the Inspector.
How to insert Artboards using the Template Library
To set or change an Artboard’s orientation, select it on the Canvas or in the Layer List, then choose the horizontal icon or vertical icon next to its dimensions in the Inspector.

How to change Artboard orientation
After you create an Artboard, you can press ⌘D to duplicate it. If you change the spacing between your original Artboard and the duplicate, then press ⌘D again, the next duplicate will use the same spacing.
Note: you can convert a selected Symbol Source into an Artboard using the Layer > Convert Symbol to Artboard menu option, the context menu or using ⇧⌘Y.
Moving Artboards
To move an Artboard, you’ll need to select it. If it doesn’t have any layers inside it, you can click anywhere on it. If it does, you’ll need to click its title on the Canvas, or select it in the Layer List. You can then drag it around the Canvas, use the arrow keys to move it, or change its X and Y values in the Inspector.
How to move Artboards
Resizing Artboards
To resize an Artboard, select it and then click and drag on the selection handles that appear around it. You can also edit its dimensions in the Inspector.
How to resize Artboards
You can click the lock icon between the width and the height values in the Inspector, or use the shortcut ⌥⌘L, to maintain the Artboard’s aspect ratio as you resize it.
You can also set an Artboard to resize its contents at the same time by selecting Adjust contents on resize in the inspector. You’ll need to make sure you’ve set up resizing contraints for the layers within it first, though.
How to resize content in Artboards
Finally, you can set your Artboards to automatically resize to fit their contents by using the Fit button in the Inspector.
Creating an Artboard Template
To save any Artboard as a Template, select or create an Artboard, then enable the Template option in the Inspector.

Saving an Artboard as a Template
Any content, grids or guides you include within the Artboard itself will become a part of the Template. If you update the Artboard it will automatically update the Template but not any Artboards created from the original Template.
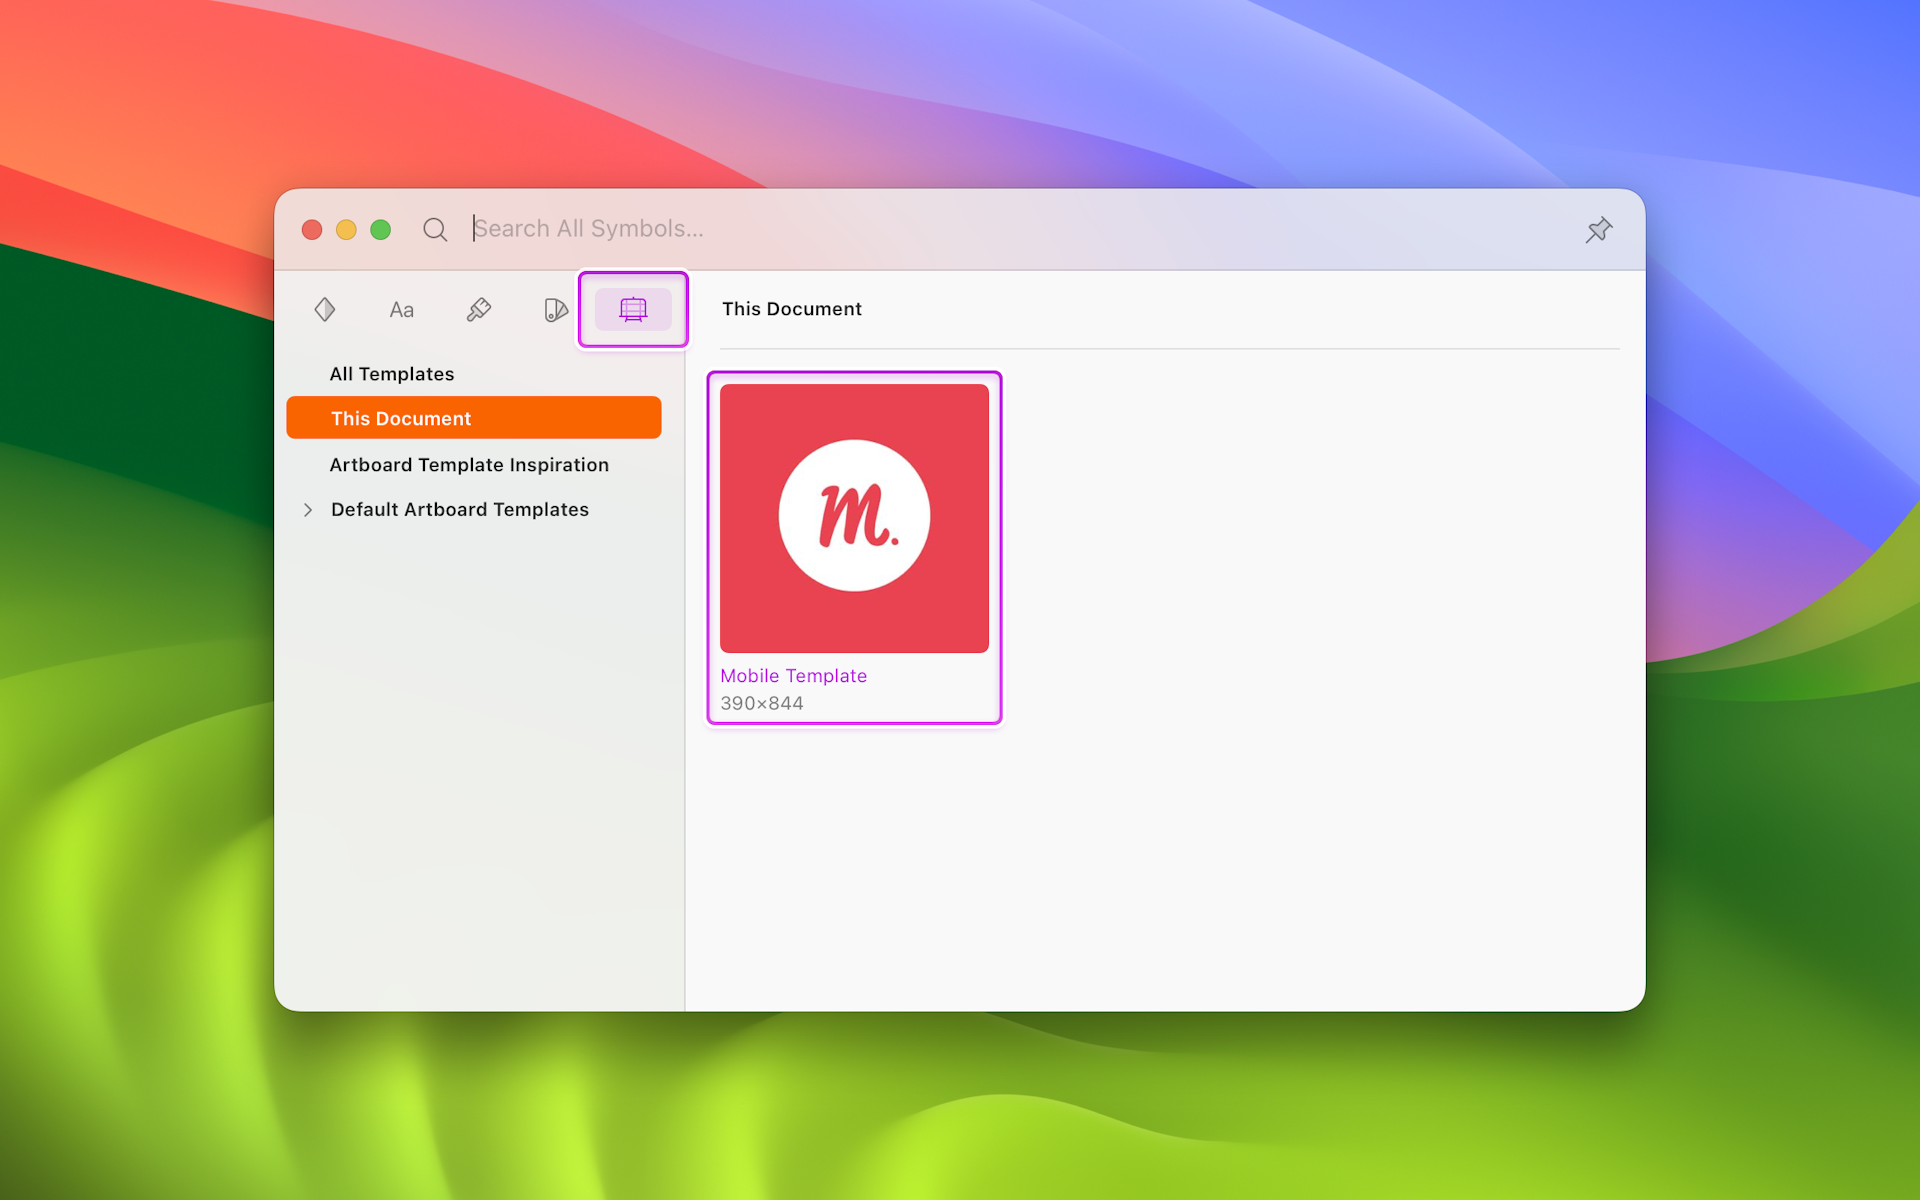
The Artboard will now appear under the Current Document dropdown option of the Artboard Templates Library. Its name follows the title of the original Artboard.

How a saved Artboard appears in the Template Library
Note: From version 89 of the Mac app, any existing Artboard presets will be migrated to the Artboard Templates Library and placed under the Migrated Artboard Presets dropdown option.
You can create custom preview thumbnails for your Artboard Templates by adding an Artboard with the name Previews/Artboard_Template_Name in the same document or Library.

Creating an Artboard Template Preview
Any Artboard Templates you create will also be available in the Insert Window:

How to insert an Artboard based on a Template using the Insert Window
Artboard Templates can be included as part of a Library to make them available for other documents.
Deleting Artboards
To delete an Artboard, select it and press backspace on your keyboard. Doing this will also delete any layers within it. If you want to keep an Artboard’s contents but delete the Artboard itself, select it and choose Ungroup from the toolbar, or press ⌘⇧G.
